

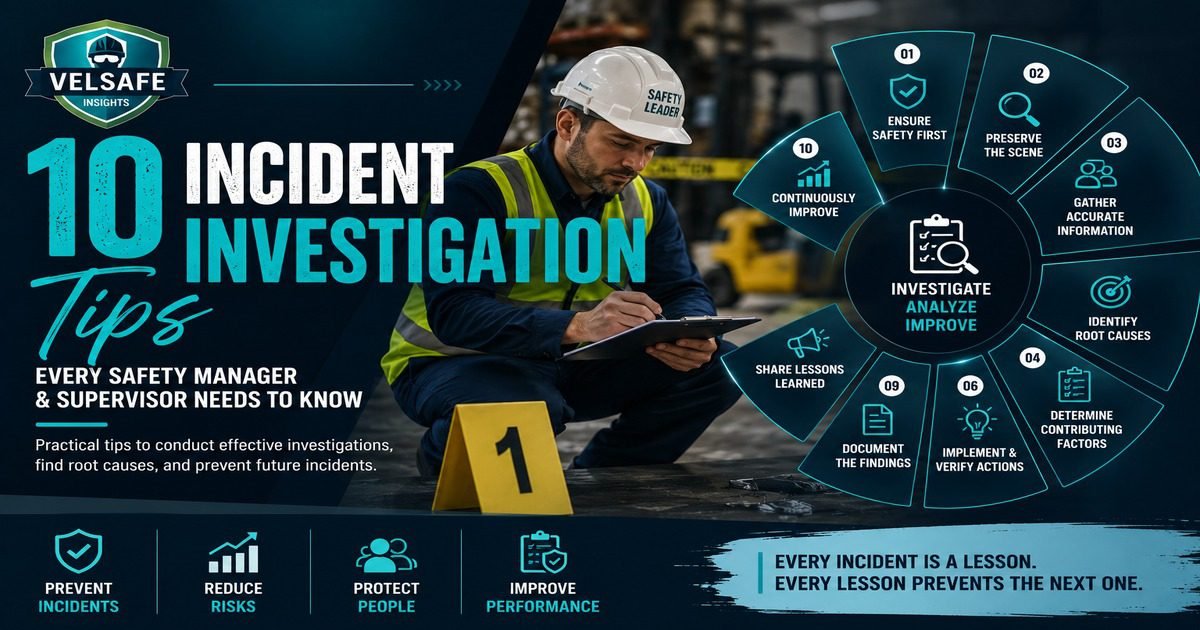
TIPS: Incident Investigation
Most workplace incident investigations fall short, not because investigators lack good intentions, but because they follow patterns that feel thorough without actually identifying the conditions that caused the incident. These ten tips are drawn from the specific failure points that appear most consistently in workplace investigations: scene management, witness interviews, root cause analysis, and the corrective actions that prevent the next incident from happening.
Quick Tip Summary
1. Start the investigation within 1 hour, not the next morning
2. Secure the scene before anyone touches anything
3. Interview witnesses individually and immediately
4. Ask “why” at least five times before calling it a root cause
5. Never accept “worker error” as a complete root cause
6. Review records, not just memories
7. Include the injured worker in the investigation
8. Match corrective actions to the hierarchy of controls
9. Share findings organisation-wide, not just in the affected area
10. Track corrective actions to completion, not just to assignment
What You Will Learn
How to preserve physical evidence before it disappears
Why “worker error” is almost never the complete root cause
How to conduct witness interviews that yield useful information
Which records to pull and why they matter
How to select corrective actions that actually prevent recurrence
How to share lessons learned without re-traumatising the injured worker
Actionable Tips for Better Incident Investigations
1
Start Within 1 Hour
Why It Matters
Physical evidence degrades within hours: spills get cleaned, equipment gets moved, memories fade. An investigation that starts the next morning is working with a fraction of the available evidence.
What To Do
Make incident investigation start-time a written policy: investigations begin within 1 hour of notification for serious incidents, same shift for near misses. Identify who leads investigations before an incident occurs so there is no delay deciding who goes.
Common Mistake
Waiting until the end of shift or the next working day to begin the investigation because the priority was “getting back to production.” A four-hour delay routinely costs most of the physical evidence and some of the witness recall.
Pro Tip
Assign a backup investigator for every shift. If the primary investigator is not on site, the backup starts within the hour. No incident should wait for a specific person to be available.
2
Secure and Photograph the Scene Before Anyone Touches It
Why It Matters
The scene as found is your primary evidence. Once a guard is replaced or a spill is cleaned, that evidence is gone permanently.
What To Do
Immediately cordon off the incident area. Photograph from multiple angles: wide shots showing the full context, mid-range shots showing the relevant equipment and surfaces, and close-ups of specific details. Photograph before moving anything. Include a scale reference (ruler, hard hat) in close-up shots where size matters.
Common Mistake
Photographing the scene after the area has been cleaned and equipment repositioned “for safety.” If returning to production requires changing the scene, photograph extensively first and document what was changed and why.
Pro Tip
Keep an incident investigation kit in your safety office: measuring tape, markers, evidence bags, camera (or know which phone has the best camera on each shift), and a scene sketch template. Preparation prevents fumbling at the scene.
3
Interview Witnesses Individually and Immediately
Why It Matters
Within 30 minutes of an incident, witnesses begin comparing notes with each other. Group conversations before individual interviews contaminate individual recollections: people conform their accounts to what others say, especially when a senior person is present. Individual interviews conducted promptly capture genuine, uninfluenced accounts.
What To Do
Separate witnesses before interviewing. Ask open questions (“Tell me what you saw from the beginning”), listen without interrupting, then follow up. Document what was said, not what you expected to hear.
Common Mistake
Conducting a group debrief before individual interviews because “it’s more efficient.” The efficiency cost is contaminated witness accounts. It is never more efficient to have worse evidence.
Pro Tip
Always interview the injured worker. They were closest to the event and typically have the most detailed account. Conduct the interview when they are medically stable, frame it as fact-finding (not blame-finding), and listen without interruption.
4
Never Accept “Worker Error” as the Root Cause
Why It Matters
“Worker error” as a root cause is almost always a symptom, not a cause. The investigation question is not whether the worker made an error; it is why the conditions existed that allowed or encouraged that error. Were they adequately trained? Was the procedure clear and current? Was there production pressure? Were they fatigued? “Worker error” as a final answer produces “retrain the worker” as the corrective action, which almost never prevents recurrence.
What To Do
When worker error appears in the causal chain, ask: Why did the worker make that error? Was there a procedure? Was it followed in practice? Was the worker trained? Were they working under time pressure? Could the task be designed so the error was not possible? Keep asking until you reach a systemic answer.
Common Mistake
Stopping the investigation at “worker failed to follow procedure” without asking why the worker did not follow it, whether the procedure was current and workable, and whether anyone was enforcing it.
Pro Tip
Write the direct cause at the top and ask “Why?” five times. If the fifth answer is systemic (absent procedure, management tolerance of shortcut), you are approaching a genuine root cause.
5
Pull the Records Before They Are Altered
Why It Matters
Training records, maintenance logs, inspection checklists, and procedure versions often reveal whether training occurred, equipment was maintained, and inspections flagged the hazard. These records can also be altered once people know an investigation is underway; secure them early.
What To Do
Secure printed or digital copies of relevant records as part of scene preservation: the training record for the task performed, the maintenance log for the equipment involved, the last inspection checklist for the area, and the current version of the applicable procedure. Secure them early.
Common Mistake
Pulling records a week after the incident when supervisors have had time to “complete” overdue checklists or update training logs. The record as it existed at the time of the incident is the relevant evidence.
Pro Tip
For digital records, note the exact timestamp and system version when you retrieve them. If records are later disputed, the timestamp establishes what existed at time of retrieval.
6
Investigate Near Misses With the Same Rigour as Injuries
Why It Matters
A near miss reveals the same systemic failures as an injury. The only difference is outcome. Workplaces that treat near misses as nothing-happened events typically see those same conditions produce injuries later.
What To Do
Create a near-miss reporting system that is easy to use and genuinely non-punitive. Investigate reported near misses using the same procedure as recordable incidents. Publicly recognise workers who report near misses: they are providing the organisation with free early warning signals.
Common Mistake
Treating near-miss reporting as a paperwork obligation: filling out the form but not actually investigating the conditions that caused the near miss. A completed form is not an investigation.
Pro Tip
Track your near-miss to injury ratio. High near-miss reporting indicates a healthy reporting culture. Low reporting with any injuries indicates under-reporting. A ratio of 20-30 near misses per recordable injury is typical in engaged safety cultures.
7
Match Corrective Actions to the Hierarchy of Controls
Why It Matters
Corrective actions that rely on worker behaviour (training, reminders, warnings) are the least reliable controls in the hierarchy. Engineering controls that make the hazardous condition physically impossible are more reliable. The corrective actions that are easiest to implement (training, signage) are typically the ones least likely to prevent recurrence. Effective investigations produce corrective actions at the highest feasible level of the hierarchy.
What To Do
For each root cause, work through the hierarchy: Can the hazard be eliminated? Can an engineering control prevent exposure? If only administrative controls or PPE are feasible, document why higher-level controls were not practicable.
Common Mistake
Defaulting to “retrain affected workers” as the primary corrective action for every incident regardless of the root cause. Retraining is appropriate when training was genuinely the root cause gap; it is not appropriate as a universal response.
Pro Tip
For each corrective action, ask: if this person makes the same error again, does this control prevent the injury? If not, layer additional controls so a single failure cannot produce an injury.
8
Share Findings Across the Organisation, Not Just the Affected Area
Why It Matters
The same hazardous condition that caused an incident in one area often exists in other areas of the same facility or at other sites. Investigation findings that are communicated only to the affected team miss the opportunity to prevent the same incident from occurring elsewhere. Organisation-wide sharing of lessons learned is one of the highest-return activities in safety management.
What To Do
After each significant investigation, prepare a one-page lessons-learned summary (what happened, what was found, what was done) without naming the injured worker. Share it in safety meetings and toolbox talks.
Common Mistake
Sharing investigation findings only with the department involved because “it’s not relevant to anyone else.” Most workplace incident root causes are relevant to multiple areas: inadequate training, absent procedures, and deferred maintenance affect everyone, not just the department where the incident occurred.
Pro Tip
Build a one-page “Lessons Learned” template into your investigation report. Completing it forces the investigator to distil the findings into a format that can actually be shared and understood quickly in a toolbox talk or safety meeting.
9
Track Corrective Actions to Completion, Not Just to Assignment
Why It Matters
Corrective actions that are assigned but never verified are intentions, not controls. An investigation whose corrective actions are never implemented has produced no safety improvement, regardless of how thorough the investigation was.
What To Do
Every corrective action needs a named responsible person, a due date, and a verification step. Track open items monthly in your safety committee. Close actions only when verified complete, not when assigned.
Common Mistake
Closing corrective actions when an email is sent or a form is signed, without verifying that the actual corrective action (procedure update, guard installation, training delivery) has been completed and is functioning as intended.
Pro Tip
Schedule 30-day and 90-day effectiveness checks: at 30 days verify the action was completed; at 90 days verify the root cause condition has not recurred.
10
Train Your Investigators Before They Investigate
Why It Matters
Incident investigation is a skill requiring specific training and practice. Supervisors without training consistently make the same errors: failing to preserve evidence, accepting worker error as a root cause, and generating inadequate corrective actions.
What To Do
Provide formal investigation training to all supervisors and designated investigators before they lead an investigation. At minimum, training should cover scene preservation, witness interviewing techniques, root cause analysis methods (5 Whys, fishbone), the hierarchy of controls, and your organisation’s investigation procedure and documentation requirements.
Common Mistake
Assuming that being a good supervisor or having years of safety experience automatically makes someone a competent investigator. Investigation is a specific skill that must be taught, practised, and periodically refreshed.
Pro Tip
Pair new investigators with experienced ones for their first two or three investigations before they lead solo. Mentored investigations build skills faster than training alone and catch errors before they become habits.
Quick Checklist: Incident Investigation
At the Scene
Scene secured and cordoned off immediately
Photographs taken before anything is moved
Witnesses identified and separated
Relevant records secured (training, maintenance, procedures)
During Investigation
Each witness interviewed individually
5 Whys or fishbone used for root cause analysis
Worker error not accepted as a complete root cause
Hierarchy of controls applied to corrective action selection
After Investigation
Corrective actions assigned with names and due dates
Lessons learned shared organisation-wide
30-day and 90-day effectiveness checks scheduled
Investigation report completed and filed
Common Mistakes in Incident Investigations
Mistake
Why It Matters
Investigating the next day instead of within the hour
Physical evidence is gone, the scene has been cleaned, and witness memory has been contaminated by conversation. The investigation starts with a fraction of the available evidence.
Using group debriefs instead of individual witness interviews
Group debriefs contaminate individual accounts. Witnesses conform to the most vocal account. Contradictions that would reveal important facts get smoothed over before the investigator hears them.
Assigning “retrain the worker” as the only corrective action
Training is the lowest-reliability control in the hierarchy. If the same systemic conditions exist, the same error will occur again. Retraining is only appropriate when training was genuinely the gap in the causal chain.
Real-World Application
What a Well-Run Investigation Looks Like in Practice
A warehouse supervisor receives a slip-and-fall report. Within 20 minutes, the area is photographed and witnesses are separated for individual interviews. The maintenance log reveals the drainage system had been flagged as partially blocked in two prior inspections, neither of which generated a work order. Corrective actions address the drainage repair (engineering), the inspection-to-work-order escalation procedure (administrative), and the supervisor’s authority to hold an area out of service pending maintenance. Training is updated, but it is not the primary corrective action.
Note: This example illustrates common investigation patterns and is not based on a specific incident.
Downloadable Resource: Incident Investigation Checklist
Use the three-phase checklist above before, during, and after every investigation. Copy it into your investigation form as part of your standard procedure. For a complete form template including the 5 Whys worksheet and corrective action tracker, refer to your site’s safety management system documentation.
Use checklist above
Key Takeaways
Investigation quality determines whether the next incident is prevented
An investigation that identifies a genuine root cause and implements a corrective action at the right level of the hierarchy prevents recurrence. An investigation that identifies “worker error” and retrains the worker sees the same incident again. The difference is entirely in how the investigation is conducted.
Time and evidence are the two things you cannot get back
Scene preservation, immediate witness interviews, and prompt record collection are the highest-return investments in investigation quality. Everything that follows the first hour is built on what was captured in the first hour.
Near misses are the best warning system you have
Organisations that investigate near misses with the same rigour as injuries consistently outperform those that do not. Near misses are the system telling you what is about to happen. A high near-miss to injury ratio indicates a healthy reporting culture, not an unsafe workplace.
Frequently Asked Questions
Who should lead a workplace incident investigation?
Someone with investigation training who is senior enough to access all relevant records and personnel but was not directly involved in managing the work at the time. In most organisations this is the safety manager or trained EHS professional, supported by the area supervisor. Worker representatives should be included where a joint health and safety committee or union agreement requires it. The investigation leader must be perceived as impartial: a supervisor investigating their own team’s incident creates a conflict of interest that typically produces inadequate root cause analysis and incomplete identification of systemic conditions.
How detailed does an incident investigation report need to be?
Detailed enough for someone not present to understand what happened, why, what systemic factors contributed, and what corrective actions were taken. At minimum: sequence of events, direct and root causes, evidence reviewed, witnesses interviewed, corrective actions with responsible parties and due dates, and a lessons-learned summary. For serious injuries, comprehensive enough to withstand regulatory scrutiny if OSHA requests it.
How do you conduct a useful investigation when the injured worker is unavailable or unwilling to be interviewed?
Begin with available witnesses, physical evidence, and relevant records. Interview the injured worker when available and willing, even if days have passed. If genuinely unwilling, document that the interview was offered and complete the investigation with available evidence. Never pressure injured workers or make participation a condition of benefits. A non-punitive investigation culture significantly increases participation.
Government and Regulatory Sources
- OSHA – Incident Investigation
- OSHA – Recordkeeping Rule (29 CFR 1904)
- OSHA – Process Safety Management (29 CFR 1910.119)
Related VelSafe Articles
VelSafe Safety Training
Every incident is a data point. The teams that improve fastest are those that investigate thoroughly, share findings, and act on root causes before the next event. Explore VelSafe’s incident investigation and safety management resources.
Browse Safety Tips