TIPS: HAZWOPER Emergency Response Operations
HAZWOPER: Scene Assessment Tips
How to Size Up a Hazmat Incident Before Anyone Gets Hurt
The decisions made in the first two minutes of a HAZWOPER scene arrival establish the character of the entire response. A systematic scene assessment protects responders, drives the right PPE and zone decisions, and gives the Incident Commander the information needed to run an effective operation. These tips cover what to look for, in what order, and what to do with what you find.
#1
Protect Yourself First
The primary rule of every hazmat scene assessment: do not become a victim. A responder who enters without a systematic assessment may be the next person needing rescue. Assess before you approach, always.
OSHA HAZWOPER, CHEMM Guidance
6
Hazmat Size-Up Clues
Six systematic clues guide the initial hazmat size-up: occupancy, containers, labels and placards, markings, material properties, and victims or symptoms. Working through all six prevents tunnel vision on the most obvious hazard.
OSHA HAZWOPER Training Framework
ERG
First Reference Tool
The 2024 DOT Emergency Response Guidebook is the first reference used to establish initial isolation distances. Hot zones established using ERG guidance cannot be reduced until confirmed by actual air monitoring data.
DOT/PHMSA, 2024 ERG
Why Scene Assessment Is the Most Dangerous Step
Scene assessment sounds like a deliberate, methodical process. In reality, it happens under time pressure, with incomplete information, while other people are waiting for direction. The responders who get hurt during scene assessment are usually the ones who skipped it: they saw something obvious (a victim, a leak, a fire), moved toward it immediately, and entered a hazard zone they did not understand.
Every hazmat incident must be treated as unknown until the assessment says otherwise. The call may be for a chemical smell, but it could be a building full of chlorine. The truck may be marked as carrying fertilizer, but it could be leaking anhydrous ammonia. The person on the ground may look like they tripped, but they may be the sixth person overcome by a vapor cloud you cannot see.
A systematic scene assessment protects you, gives the Incident Commander accurate information, drives the right PPE level decision, and establishes zone boundaries that protect everyone who arrives after you. These tips are organized in the order they should happen.
Quick Summary: Scene Assessment in Sequence
Step 1: Approach safely
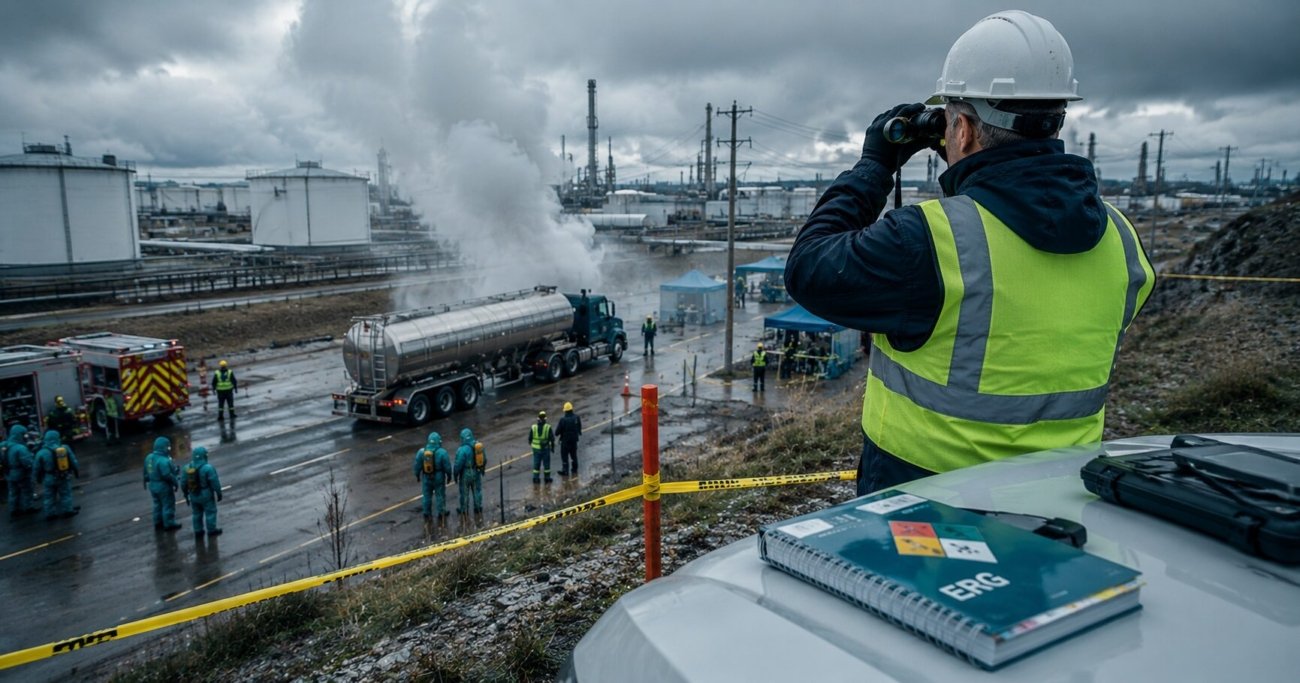
Upwind, uphill, upstream. Stay out of low areas where vapors accumulate. Position your vehicle so it can leave forward without reversing into the scene.
Step 2: Observe from a safe distance
Use binoculars. Read placards, labels, and markings. Look for victims, leak sources, and environmental conditions before moving closer.
Step 3: Identify the substance
Use ERG, SDS, placards, and any available site information. Do not approach to read a label if you can read it through binoculars or by calling the shipper or CHEMTREC.
Step 4: Establish initial zones
Use ERG isolation distances to establish the initial hot zone. No one enters without the appropriate PPE. Zones can only be reduced based on air monitoring data, never assumption.
Step 5: Notify and activate ICS
Activate the Incident Command System, brief arriving responders, and notify required agencies. Scene assessment findings go directly to the Incident Commander to drive all subsequent decisions.
Tip 1: Approach Upwind, Uphill, and Upstream
1
Approach Direction Is Not Optional
WHY IT MATTERS
Vapors and gases travel with the wind. Liquids run downhill and flow downstream. An upwind approach keeps vapors away from you. An uphill approach keeps liquid contaminants from flowing toward your position. Approaching from the wrong direction can take you directly into a vapor cloud that you cannot see, smell, or detect without instruments until you are already exposed.
WHAT TO DO
Before you get close, identify wind direction (watch smoke, flags, or dust). Check terrain. Position your vehicle and staging area upwind, uphill, and upstream of the incident. Keep the vehicle pointed in a direction that allows departure without reversing toward the hazard.
COMMON MISTAKE
Arriving downwind because it is the most direct route and assuming you will know if the air is bad. Many toxic vapors have no odor at concentrations that cause injury. Hydrogen sulfide, for example, paralyzes the olfactory nerve at high concentrations so you stop smelling it right before it incapacitates you.
Tip 2: Read the Scene Before You Move
2
Observe Everything Before Approaching
WHY IT MATTERS
The most information-rich position is the one you can safely occupy without PPE. Once you put on a Level A suit and approach the scene, your field of vision narrows, your communication is limited, and your time on scene is restricted by your SCBA air supply. Use your safe distance observation time to gather as much information as possible before any entry decision is made.
WHAT TO DO
Use binoculars to read placards, labels, and markings from a safe distance. Look for: type and number of containers; visible release (liquid, vapor, or no visible release); victims and their location and condition; environmental features (storm drains, waterways, building openings); and any secondary hazards such as fire, structural damage, or downed electrical lines.
PRO TIP
The ERG placard identification chart in the white pages is specifically designed for reading from a distance. Know the chart before you need it. A four-digit UN number read through binoculars gets you to the right guide page without approaching the container.
Tip 3: Work Through All Six Size-Up Clues
A systematic hazmat size-up uses six categories of information to build a complete picture of the incident. Working through all six prevents the tunnel vision that causes responders to miss a critical hazard while focusing on the obvious one.
1. Occupancy and Location
What kind of facility or location is this? A chemical plant, a gas station, a farm, a residential area? The occupancy tells you what kinds of hazardous materials are likely present even before you can identify anything specifically. A fertilizer distribution facility has different hazard profiles than a hospital loading dock.
2. Containers
What types and sizes of containers are present? A pressure vessel behaves very differently from an open-top drum. The container type tells you how the material is stored (pressurized, ambient, refrigerated), how it might release, and how far it might travel. The ERG rail car and road trailer identification charts in the white pages are your first reference for container identification.
3. Labels and Placards
DOT hazmat placards and GHS labels are the fastest path to chemical identification from a safe distance. The four-digit UN/NA number on a placard goes directly to the yellow pages of the ERG. The hazard class diamond gives you immediate information about the primary hazard category. Read these before approaching.
4. Markings
Beyond placards and labels, look for product names on containers, shipping papers visible through vehicle windows, company names on trucks, and pipeline markers. A pipeline marker gives you the substance name, the operator’s emergency contact number, and the pipeline operator’s regulatory identity. Call that number before approaching.
5. Material Properties
Once you have identified or suspected the material, check its properties: is it flammable, corrosive, toxic, reactive, or a combination? Is it a gas, liquid, or solid? Does it present a vapor pressure that drives airborne exposure? Is it water-reactive? Material properties drive zone size, PPE level, and evacuation versus shelter-in-place decisions.
6. Victims and Symptoms
The number, location, and condition of victims are critical data points. Are they ambulatory or incapacitated? Are they clustered near a specific source? Are bystanders showing symptoms (eye irritation, coughing, disorientation) that indicate vapor exposure? Victim patterns tell you where the hazard is concentrated and how fast it is spreading.
Tip 4: Use the ERG to Set Initial Isolation Distances
4
ERG Isolation Distances Are Minimums
WHY IT MATTERS
The 2024 DOT Emergency Response Guidebook provides initial isolation distances for specific chemicals in the green pages. These distances are based on statistical analysis of known release scenarios and are designed as conservative minimums for the first 30 minutes of an incident. They are the best tool available for establishing zones before air monitoring equipment is in place and operational.
WHAT TO DO
Look up the material by UN number in the yellow pages or by name in the blue pages. Find the guide number. For materials listed in the green pages, use the initial isolation distance to set your hot zone perimeter. Apply the protective action distance (the larger radius) to determine shelter-in-place or evacuation areas. Zones set using ERG distances cannot be reduced until air monitoring data confirms the reduction is safe.
CRITICAL RULE
Hot zones established using ERG guidance are minimums. Wind speed, terrain, container size, and quantity of material released can all require larger zones than ERG recommends. Use the ERG as a floor, not a ceiling.
Tip 5: Do Not Enter Until PPE Is Selected and On
5
No Entry Without Appropriate PPE and a Buddy
WHY IT MATTERS
The pressure to help victims quickly is real and understandable. It is also dangerous. Responders who rush into a hazmat scene without PPE based on assessment results become casualties. Every person who enters the hot zone without appropriate PPE is a resource loss and a rescue problem that makes the entire incident worse.
WHAT TO DO
Select PPE level based on the scene assessment findings. If the substance is unknown, assume IDLH conditions and select Level A or Level B with SCBA as the default entry level. No entry without a buddy. No buddy without a defined communication check schedule and exit signal protocol established before entry.
COMMON MISTAKE
Approaching to “take a closer look” without PPE to get more information before suiting up. The closer look is for instruments and binoculars from a safe distance. Entering with your senses to gather information is entering the hazard zone without PPE. Those are the same thing.
Tip 6: Notify Before You Need Help
6
Notify Early and Notify Completely
WHY IT MATTERS
Hazmat resources take time to arrive. CHEMTREC, the fire department’s hazmat team, environmental agencies, and medical resources all have response times. If you wait until you have confirmed the worst case before calling for them, you are already behind. Early notification with what you know gets resources moving in the right direction while you continue the assessment.
WHAT TO DO
Call CHEMTREC (1-800-424-9300) as soon as you have a chemical identity or even a partial identity. Notify the local fire department hazmat team, poison control, and the Local Emergency Planning Committee (LEPC) as your scene assessment indicates the scope. For transportation incidents, notify the National Response Center (1-800-424-8802) if a reportable quantity has been released.
PRO TIP
CHEMTREC has access to manufacturer-specific emergency response information and can connect you directly to the chemical manufacturer’s emergency response team. This information often exceeds what is in the SDS or ERG for specific response decisions.
Tip 7: Air Monitoring Is Not Optional
7
Monitor Continuously; Downgrade Only on Data
WHY IT MATTERS
Scene conditions change. A release that appeared stable ten minutes ago may have grown as wind shifted, temperature rose, or the container continued to fail. Air monitoring is the only way to track what is actually happening in the atmosphere, verify whether zones need to expand, and confirm when conditions allow downgrading of PPE or zone reduction.
WHAT TO DO
Deploy air monitoring instruments (photoionization detector, combustible gas indicator, oxygen monitor, and chemical-specific detectors as available) at zone boundaries and at the entry point before any responder enters the hot zone. Monitor continuously throughout the response, not just at initial assessment. Report all readings to the Incident Commander in real time.
CRITICAL RULE
Hot zones established using ERG isolation distances cannot be reduced in size based on visual observation, elapsed time, or assumption. They can only be reduced based on confirmed air monitoring data showing concentrations are below the levels that require the current zone boundary.
Tip 8: Document Your Assessment in Real Time
8
Write It Down as It Happens
WHY IT MATTERS
Scene assessment findings drive every decision made during a HAZWOPER response. If those findings are not documented as they are gathered, the post-incident reconstruction relies on memory under stress. Inaccurate records affect post-emergency medical evaluations, post-incident critiques, legal proceedings, and regulatory agency notifications.
WHAT TO DO
Designate someone in the cold zone to log assessment findings as they are reported: times, substance identified, air monitoring readings, zone boundaries established, personnel in each zone, and all notification contacts made with times. This is a Planning Section function in the ICS. If ICS has not been fully activated, the first arriving responder or IC logs this information personally.
PRO TIP
A site map or diagram sketched during scene assessment is invaluable for briefing arriving resources. Showing the IC exactly where the release source is, where zones are set, where victims were found, and where air monitoring was conducted is far faster and more accurate than describing it verbally under pressure.
Scene Assessment Quick Checklist
Phase
Action
Approach
Identify wind direction; position upwind, uphill, upstream
Approach
Stage vehicle for forward departure; avoid low terrain areas
Observe
Use binoculars; read placards, labels, markings from safe distance
Observe
Work through all six size-up clues; note victims and symptoms
Identify
Look up UN number in ERG yellow pages; confirm material and properties
Identify
Call CHEMTREC (1-800-424-9300) with material identity or partial identity
Zone
Set initial isolation distance from ERG green pages; establish hot, warm, cold zones
Zone
Restrict access to hot zone; no entry without appropriate PPE and buddy
Notify
Activate ICS; notify fire hazmat team, LEPC, NRC if reportable quantity released
Monitor
Deploy air monitoring instruments at zone boundaries before any entry
Monitor
Monitor continuously; report all readings to IC in real time
Document
Log all findings, readings, zone boundaries, personnel, and notifications with timestamps
Key Takeaways
Approach Direction Is a Safety Decision
Upwind, uphill, upstream is not a preference. It is the difference between arriving at a manageable scene and becoming part of the problem. Identify wind direction before you get close enough for it to matter.
All Six Size-Up Clues, Every Time
Tunnel vision on the most obvious element of a hazmat scene is one of the most common and most dangerous errors in emergency response. Systematically working through all six clues takes under two minutes and catches hazards that an unsystematic assessment misses.
ERG Distances Are Minimums
Initial isolation distances from the ERG are conservative starting points, not precise boundaries calibrated to your specific incident. They can only be reduced based on air monitoring data, not on elapsed time, visual assessment, or the fact that the release appears to have slowed.
Notify Early with What You Know
Waiting for complete information before calling for resources means resources arrive after you needed them. Call CHEMTREC, your hazmat team, and required agencies as soon as you have enough information to describe the incident, even if that description is still incomplete.
Frequently Asked Questions
What should I do if I cannot identify the material from a safe distance?
Call CHEMTREC (1-800-424-9300) and describe what you can see: container type, color, any visible labels or markings, occupancy, and victim symptoms. CHEMTREC can often narrow the material identity based on this information. In the meantime, treat the atmosphere as unknown IDLH and use Level A or Level B PPE for any entry. Do not approach closer without SCBA to try to read a label.
Can I use the shelter-in-place option instead of establishing evacuation zones?
The 2024 ERG green pages include a shelter-in-place versus evacuation guidance table added specifically to help make this decision. For some materials, shelter-in-place provides better protection than evacuation, particularly when the release is brief and the outdoor air concentration would exceed indoor concentration during an evacuation. The ERG guidance, combined with current wind and atmospheric conditions, informs this decision. It is an IC-level call made with Planning Section input.
Who is responsible for scene assessment at a HAZWOPER site?
The first Awareness-level responder who arrives performs the initial size-up and notifies authorities. The Incident Commander, once activated, is responsible for ongoing scene assessment as the response develops. The Safety Officer continuously monitors scene conditions throughout the response and has the authority to call for zone expansion or entry cessation if conditions change. Planning Section staff maintain situational awareness and feed updated information to the IC.
How often should air monitoring readings be reported during a response?
Continuously at zone boundaries and at defined intervals inside the warm zone. Any significant change in readings must be reported to the IC immediately, not at the next scheduled check-in. Establish a reporting interval at the start of the response (for example, every five minutes) and report immediately for any reading that triggers a pre-established action level.
Government and Regulatory Sources
Industry References
Related VelSafe Articles
Assess First, Act Second
Every minute spent on a systematic scene assessment before entry is a minute that prevents your responders from becoming victims, produces better information for the Incident Commander, and builds the documentation that supports every decision made during the response. The responders who do this well are not slower to respond. They are more effective when they do. Find more HAZWOPER resources at velsafe.com.